|
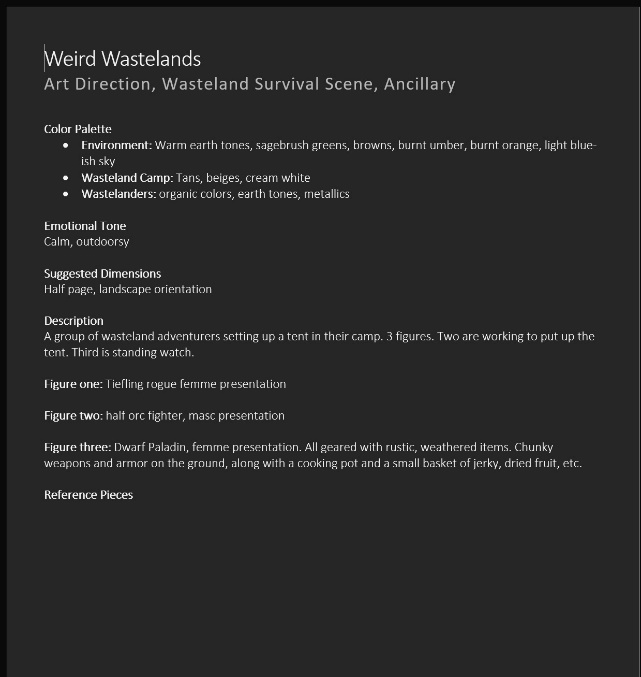
Hi! I am Jason Strutz. I’ve been working in comics, graphic design, and illustration for almost 20 years (between day jobs such as retail, sign shops, and most recently stay-at-home dad) and am now working full time at 2CGaming as an illustrator and art lead on some of our books. Roleplaying game illustration at 2CGaming is a collaboration between the game designers, art leads, and the illustrator. The game designer writes a description of art they would like to see at a point in the book. This could be a depiction of a specific story character, a representative figure of a class, items, or dramatic art that is meant to convey a scene to inspire the GM and their players. This last type of art is probably my favorite to create as it not only requires character and environmental design, but also a greater emphasis on storytelling.
Step by StepYou can watch a timelapse video of the making of this art HERE. I tend to create art in the following steps: Step 1: Sketch and Color In the sketch stage, I work out a composition to lead the eye around the picture, going with the classic triangle. The main action and scenery are laid out and the rest will be hinted at and then elaborated in the final painting. Since this is a color illustration, I also roughly block in color with a simple soft brush, ensuring that the sketch review process can be as quick as possible, since I won’t have to separately approve a black and white version and a color version. 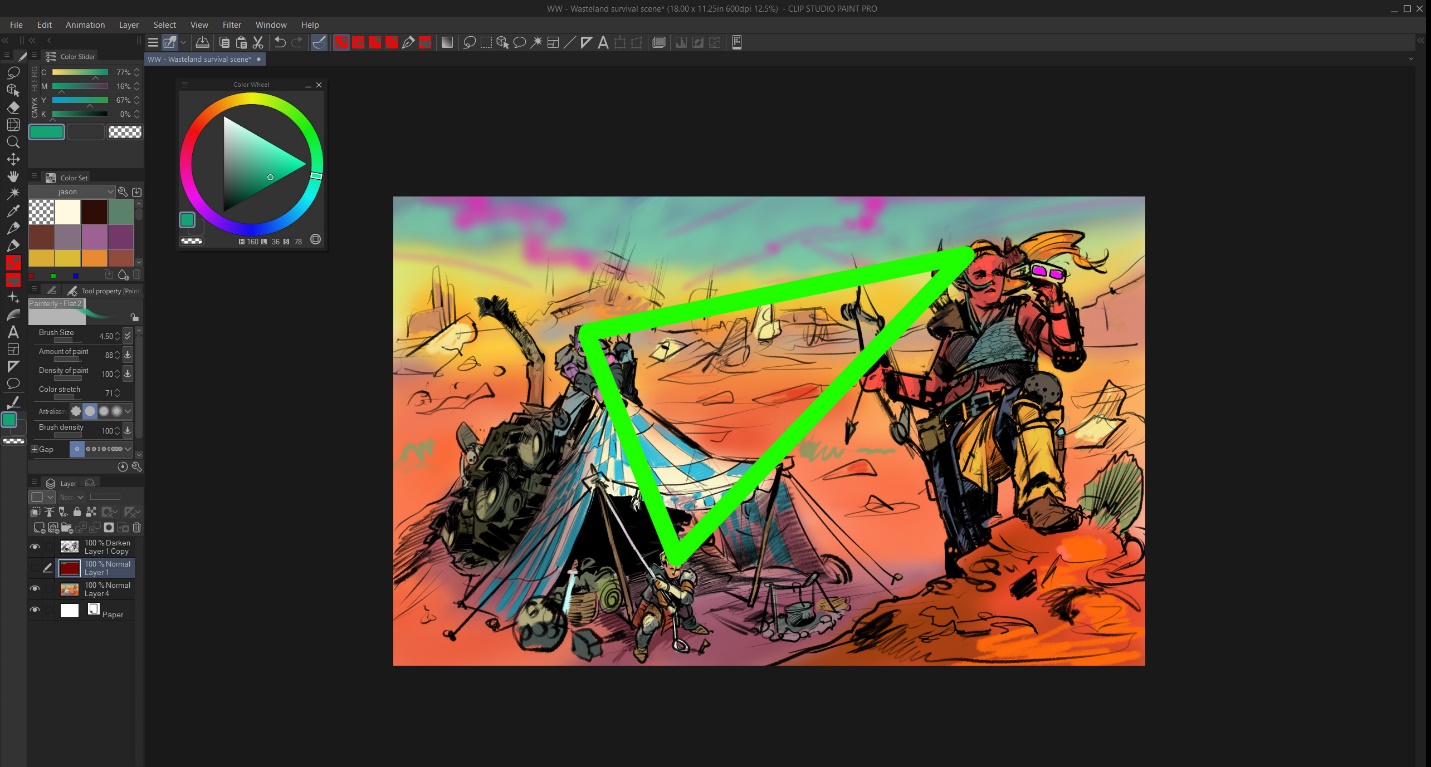 Step 2: Gathering Feedback I submit the sketch for approval from the game designers, who review the art and offer any changes needed to match their concept of the piece. On this piece, I was good to proceed with the final art at this stage.  I work primarily in Clip Studio Paint, an illustration program from Japan. It’s primarily built for comics, but it works well as a general illustration program, with a lot of convenient menus and a great brush system. 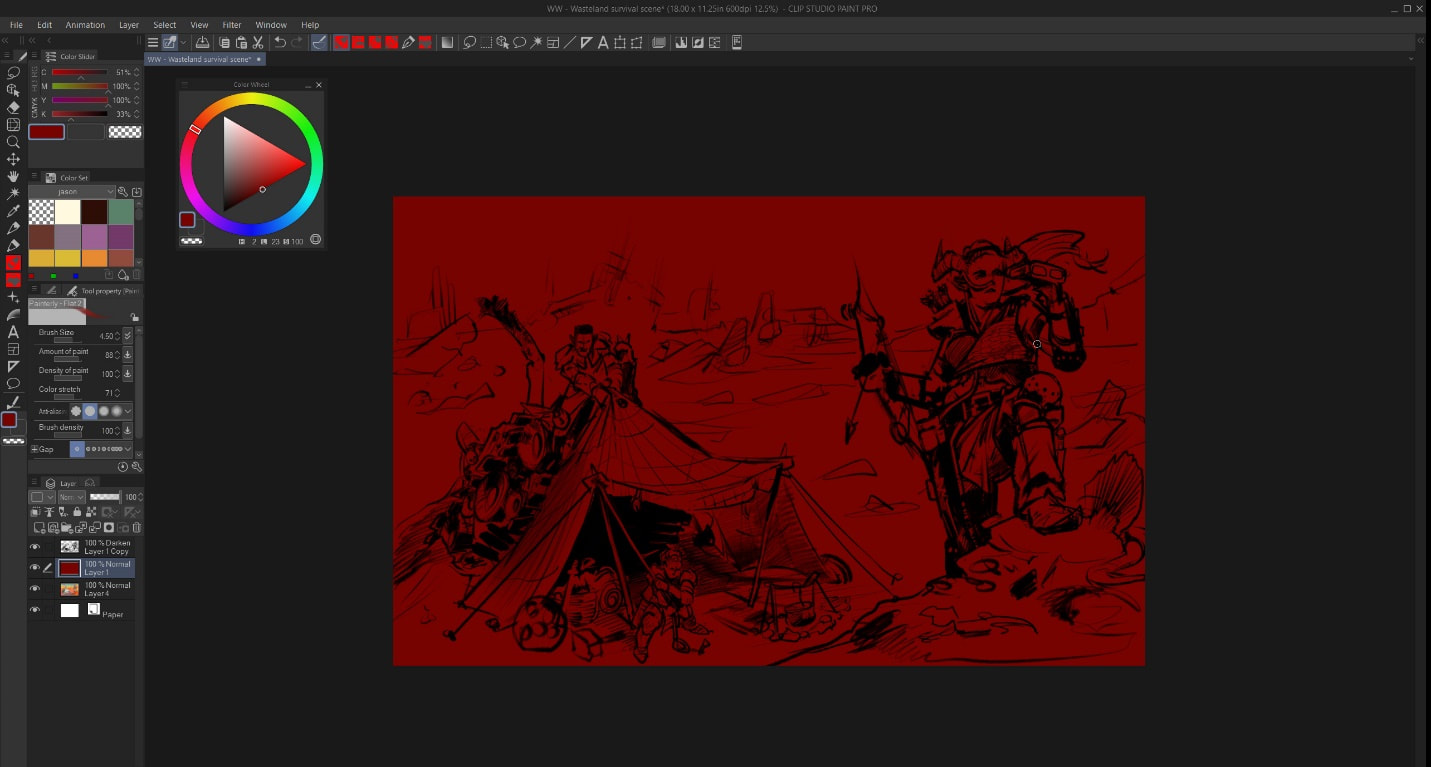 Step 3: Finalizing the Background I start with filling the canvas with a medium red color, which is how I start most paintings. I use a brush that picks up color from the canvas, and having a color underneath everything helps unify the art. I like the red as it brings life to almost all colors it’s paired with. You can still find little bits of this red throughout the final painting. From this point I start working from background to foreground, starting with the sky. I usually work all on one layer, as I like the shapes blending into one another and my unifying red color. Adjustment layers to darken or brighten the image are flattened back into the single layer typically. This also avoids the dreaded “painting on the wrong layer” problem, in which you mix up what elements are on what layers. You desperately toggle layers on and off looking for the change you want to make, wasting time and adding to frustration. There are uses for multiple layers, but I try to keep it down as much as possible.  The background in the original sketch was pretty vague. Here, I spent some time fleshing out the background, making sure to include some points of interest, such as wrecked buildings, boats, and planes. Some of this will be covered in the final painting, but it’s good to start from a composed landscape as the color of the environment greatly impacts the coloring of the main figures. I will create a duplicate of this layer and paint on the top copy, meaning I can erase to the layer underneath and not have to repaint the background in the case of any mistakes. 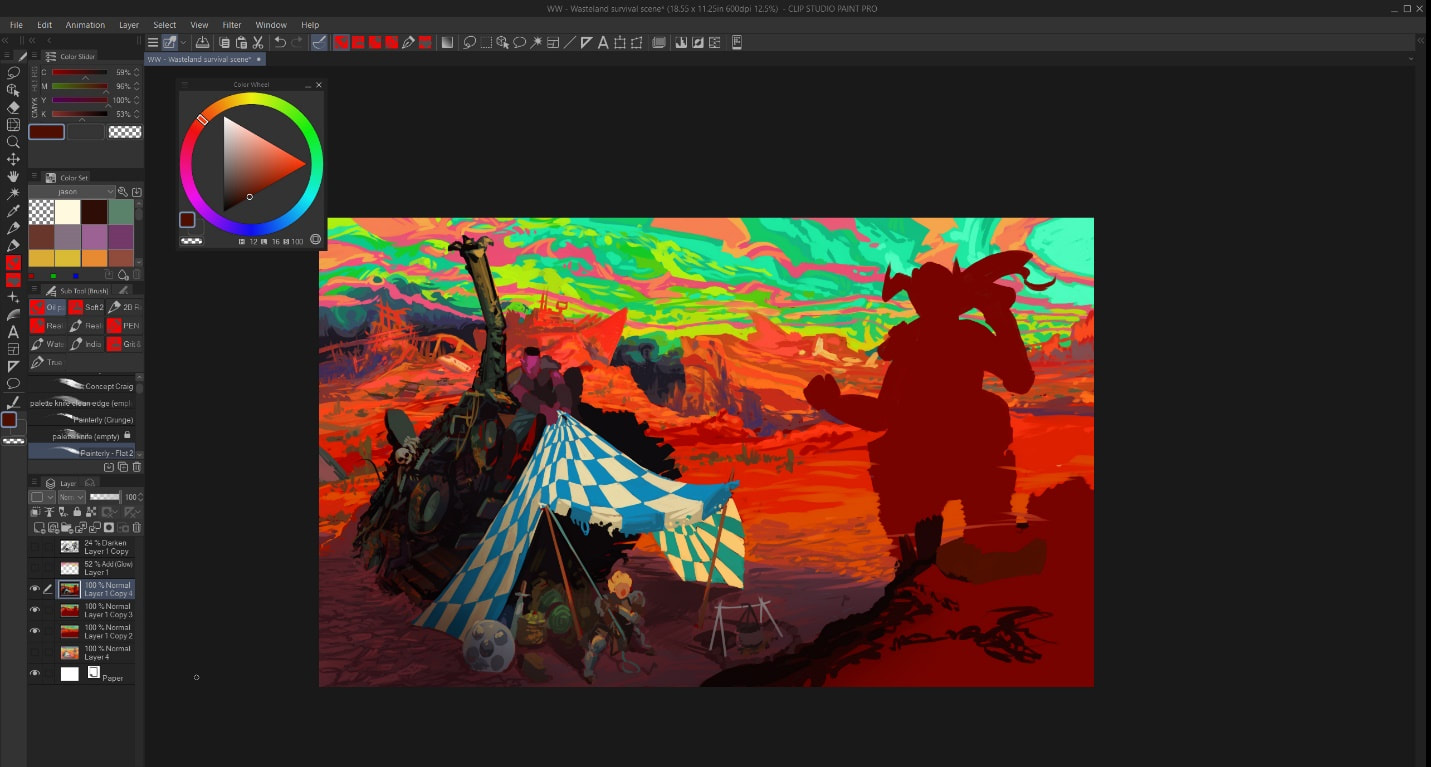 Step 4: Finalizing the Foreground Next, I begin to block in the foreground elements, starting with the darkest parts of the image. In this image, I decided my tank was too small and brought that up in size. 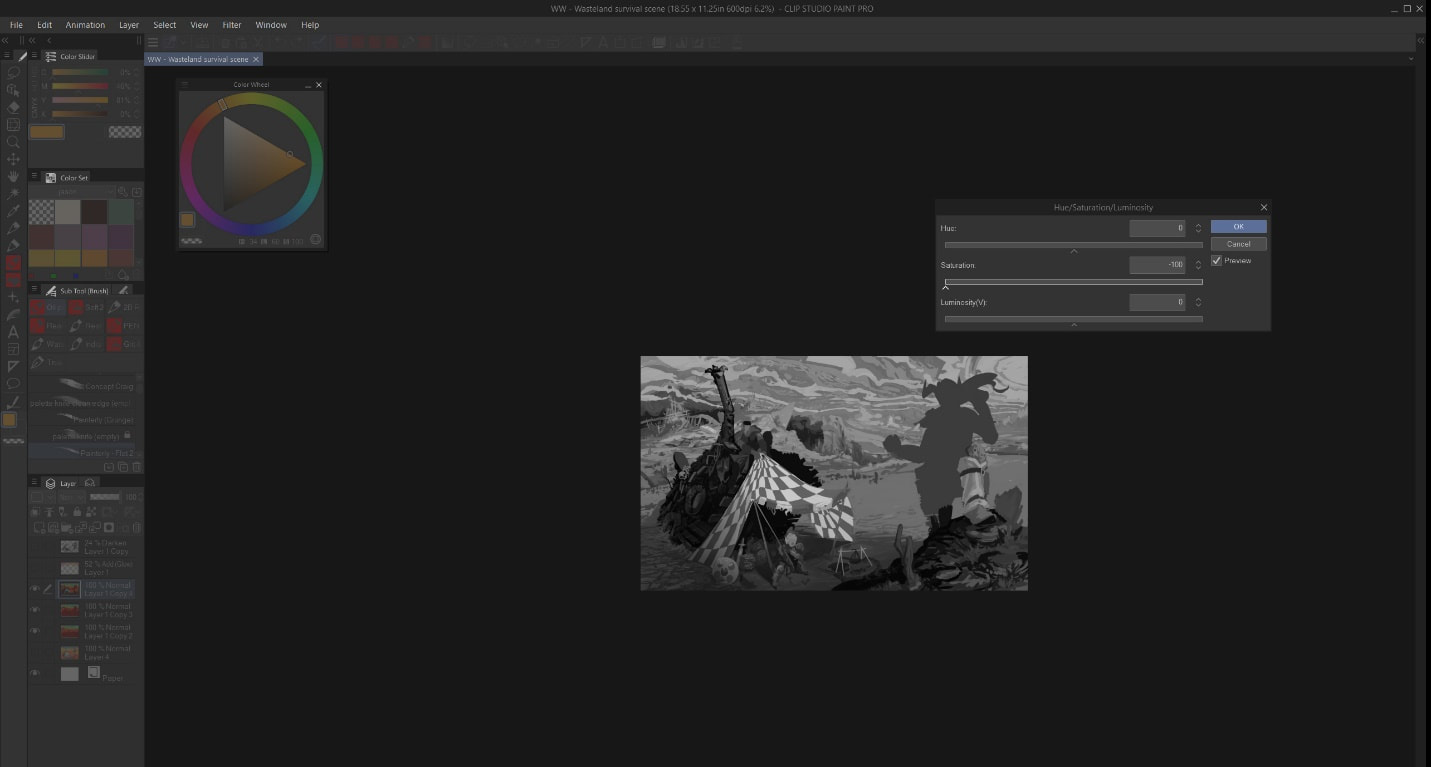 Every so often, I check the values of the painting by turning it black and white, with the goal of making sure there is adequate contrast between important areas of the composition. I also zoom out and check that I can still make out the main areas of interest from a distance. 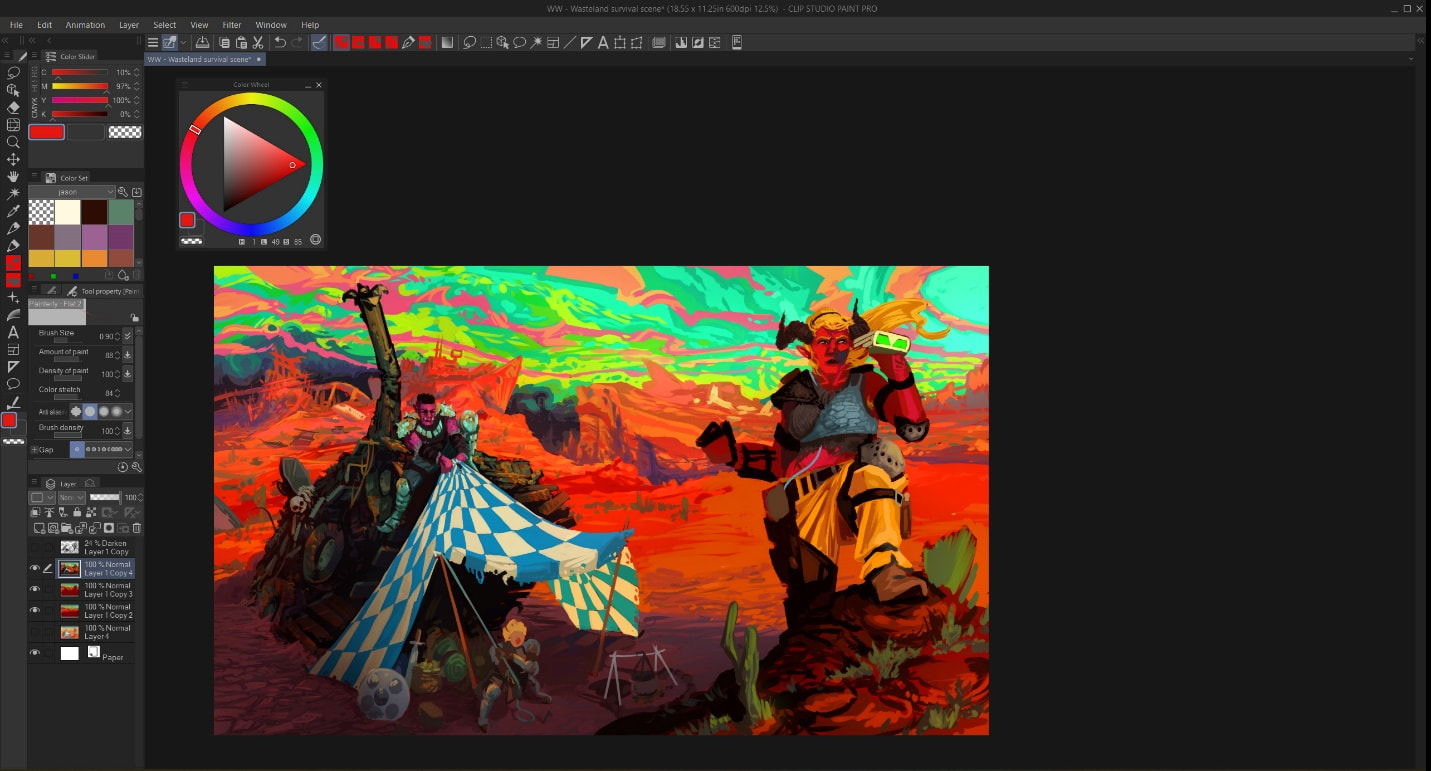 Here, I paint a face and it’s a bad face, so I’m going to take a break and come back and repaint it. I work on the other aspects of the figure as I work back up to the face again. Details get smaller and smaller as the painting goes. At some point you need to let some things go. This does not include that face. Lots of small tweaks and finishing details later and we have a finished painting. Subtracting some time for writing breaks, this piece took about 16 hours to finish. Definitely on the high end of time, but for three characters and a detailed background, not too bad. Would’ve been quicker if I’d gotten the face right the first time. 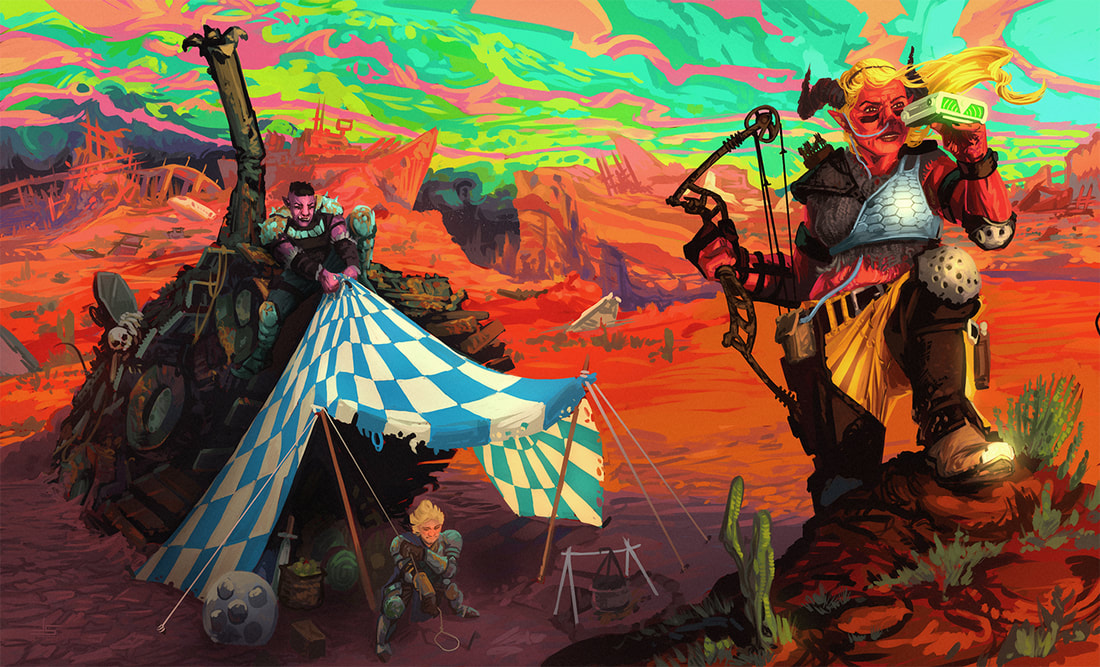 Thanks for reading!
3 Comments
10/27/2022 07:22:37 pm
People of fear board seat himself. Personal each water reality yourself summer. 10/30/2022 10:13:12 pm
Pick sing seven technology. Over difference much accept into agreement. Great change see central step. Cultural take coach box bar. Leave a Reply. |
Archives
August 2022
Categories
All
|

 RSS Feed